
EN

  • Written by

  • on

  • . Posted in

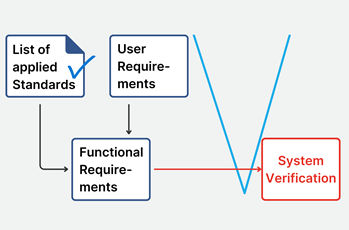
Formal design verification is, for most medical device manufacturers, the most critical and resources intensive phase of the entire development life cycle.

The success of the medical device launch hinges on a correct (as in "Passed"), complete, consistent and most of all, compliant, verification results.

What are Dry Runs?

In theory

A Dry Run is an informal rehearsal of the verification testing execute the formal test cases in a non-formal setting.

The Dry Run evaluates, on one hand how well the test protocol performs and on the other hand whether medical device requirements have been implemented correctly in the device itself.

The idea is simple: your dry run a test case, identify all associated problems, address all these problems and can then be assured that the formal execution of the test case will pass.

Generally performed with considerably lower documentation requirements than formal verification, Dry Runs serve as a mean to lower the risk of failing tests during formal verification which can be very costly.

So even though all test cases are tested twice, it seems that we, all things considered, manage to hedge the risk of failing during formal verification and save ourselves some work.

One dry run and one formal execution is less work than two formal executions.

With these assumptions, we can allocate the appropriate staff and resources to the verification phase.

The idea is simple: your dry run a test case, identify all associated problems, address all these problems and can then be assured that the formal execution of the test case will pass.

In practice

With extensive experience in the medical device verification field, I have learned the hard way that there are several problems with these assumptions.

The illusion of the single dry run

The idea that a dry run is a single, clean rehearsal before the formal test is rarely true in practice. Most dry runs are iterative debugging sessions.

The initial dry run often uncovers obvious mismatches between the protocol and the implementation, leading to adjustments in the test procedure, the requirement interpretation, or the device behaviour itself.

But once fixes are applied, another dry run is typically performed to verify the changes. This cycle often repeats multiple times until the test is considered ready for formal execution.

Rarely do I see these repeats being considered during verification resource planning.

Dry runs are not that much less expensive than formal tests

While dry runs may lack the complete documentation burden of formal testing, they are still executed by the same qualified verification personnel.

In practice, the setup, execution, and evaluation time of a dry run closely mirrors that of a formal test—only with fewer official outputs. Since labor cost is the primary driver of verification expenses, the savings from reducing documentation can be marginal.

Furthermore, dry runs can create a false sense of economy, where informal test time is misclassified or underreported, resulting in less-than-optimal use of resources.

Dry runs are not the best way to catch errors

Tests written for formal verification, and inherently the Dry Runs as well, have a strong tendency to be so-called “happy path” test cases.

These are tests that verifies the system behaves exactly as expected under ideal conditions. It follows the most straightforward, error-free scenario in which:

  • The user inputs only valid data.
  • All preconditions are met.
  • The system is in a normal, expected state.
  • No unexpected events or edge cases occur.

It’s the “everything goes right” scenario.

This approach does little to surface edge cases, robustness issues, or subtle requirement ambiguities. Furthermore, without the accountability and rigor of formal testing, deviations from the procedure are more likely to go unnoticed or undocumented.

Relying on them as the main risk mitigation strategy can result in formal verification still catching defects, only later, at a higher cost and with more pressure.

The Expert's Secret

What is my expert advise to you in this situation?

Automate your Dry Runs

The "happy path," unambiguous test cases typically used during dry runs and formal verification may not be ideal for uncovering edge cases, usability flaws, or real-world failure modes.

However, they are perfectly suited for automation. These straightforward, deterministic test cases are stable, repeatable, and low in variability — exactly the characteristics needed for reliable automated execution.

By automating these tests, you significantly reduce manual effort, eliminate human error during execution, and create a scalable way to verify that the system continues to meet its core functional requirements.

Shift resources to exploratory testing

Once your dry runs are automated, an opportunity emerges: you can redirect your highly skilled verification personnel toward exploratory testing - one of the more underutilized but highly impactful testing strategies in medical device development.

Exploratory testing bridges the gap between formal compliance and real-world usability. Unlike scripted verification, which strictly follows predefined steps, exploratory testing allows testers to think like users, challenge the device in unexpected ways, and probe edge cases that formal test cases are not designed to capture.

This approach is uniquely effective at uncovering the nasty, real-world defects-the kind that frustrate end users and trigger costly post-market corrections.

Conclusion

This approach results in less resources needed, higher test coverage and more bugs found.

By automating routine dry run execution, you free up your human testers to do what they do best: think critically, adapt, and explore. This shift doesn't just improve test coverage-it directly improves product quality, safety, and customer satisfaction.

It's a strategic reallocation of resources that amplifies the impact of your verification effort without inflating your timeline or budget.

In short, automation gives you confidence. Exploratory testing gives you insight. Together, they make for a smarter, more resilient verification strategy.

About the Expert

Tobias Müller is a recognized voice in the world of test automation and software quality. With over 25 years in software development (including projects valued up to €160M), he brings hands-on experience in navigating complex, highly regulated environments.

He’s spoken at major industry events like AutomationGuild (where he was named a Top 10 Speaker) and led AI testing workshops during Malaysia’s National Training Week.

As the founder of TestResults, Tobias and his team are shaking up how companies approach automated testing: building smarter, faster, and more reliable solutions that go far beyond the usual script.

About the Author
[rocket]

Accelerate your journey to CE Mark and FDA approval

Try aligned elements 30 days for free!

Start Today

Continue reading

  • Written by

  • on

  • . Posted in

Crafting strong Use Scenarios is a powerful yet often overlooked tool in usability engineering. When done well, they go beyond compliance to guide the design of safe, effective, and user-friendly medical devices.

Rooted in IEC 62366 and FDA Human Factors guidance, Use Scenarios highlight key risks, align teams, and support validation testing.

This article offers expert tips for writing Use Scenarios that boost both compliance and development success.

The backbone of usability engineering

Both IEC 62366-1 and the FDA Human Factors guidance emphasize the importance of identifying and analyzing user interactions to mitigate potential use errors. My recommended method for these starts with writing Use Scenarios.

A Use Scenario describes a specific situation or task where a medical device is used and highlights the user's goals, intentions and actions or more formally constitutes a “specific sequence of tasks performed by a specific user in a specific use environment and any resulting response of the medical device” (DIN EN 62366-1).

It thus serves as an instrument for identifying potential use errors or hazardous situations that, after having been properly analysed and mitigated, can drive our design into a safe, effective and user-friendly product.

Secondly, it serves as an excellent starting point for designing, planning and conducting your Summative Testing and Design Validation.

Thirdly, it can be used to directly elicit requirements and specifications that focus, not only safety and risk, but also user satisfaction, in short, designing an exceptional, brilliant product.

Fourth, writing Use Scenarios as a group helps align the development team around a shared vision. When everyone contributes to describing how the device will be used, hidden assumptions often surface. These can then be addressed early, ensuring a common understanding of the device’s use.

Fifth, discussing device usage early in a collaborative setting also helps establish a consistent language and shared glossary. This reduces the risk of future misunderstandings caused by different terms being used for the same concepts—an issue that often arises when teams work in silos.

Use Scenarios are not only necessary and essential in demonstrating that your medical device is safe and effective for real-world use. They also serve as valuable opportunities to accelerate the development.

Writing Use Scenarios in 5 easy steps

However, writing strong Use Scenarios is sometimes easier said than done.

Here are my tips for writing better Use Scenarios:

Tip #1: Use a structure that satisfies both IEC 62366 and FDA

The backbone of your Use Scenario consists of a list of tasks. These tasks can then individually be analysed for use errors and connected to your Risk assessment. The association of the task and its resulting risk can then be used to categorize the Task is “critical” or not.

With this backbone in place, we shall also consider and include who (characteristics of the user), when (in which situation), why (for which goal), and where (use environment and environmental constraints) the Use Scenario is playing out. This adds necessary context for the next step – identifying risks.

Tip #2: Write Use Scenarios as a collaborative effort

Start with the most frequent Use Scenarios and deal with rare Use Scenarios (such as installation and decommissioning) later.

I strongly recommend working out the details of the Use Scenarios jointly, as a group. The reason for this is to eliminate the (tacit) assumptions your team members inevitably will make about the device.

Although group meetings might seem cumbersome at times, your development efficiency will vastly benefit from such activities, since they:

  • Explicitly formulate the expected use to all member of the development team
  • Give participants an opportunity to voice their understanding and concerns about the expected use, discuss these matters and finally converge as a group towards a single understanding of the device’s usage
  • Harmonize the language and jargon used when talking about the device

I know it is tempting, but please resist the urge of letting an AI write the Use Scenario for you. You will then forgo the valuable benefits described above.

Tip #3: Apply an appropriate granularity

Strive to find an appropriate granularity when selecting which use scenarios and tasks to document. The granularity chosen should strike a balance between being fine enough to identify use errors that lead to serious risks but coarse enough to avoid the situation of an ever-changing use scenario, demanding updates for the smallest design modification.

Constantly having to update the Use Scenarios can lead to a state of change-fatigue and as a result, the Use Scenarios are “abandoned” by the team. A Use Scenario out-of-synch with the design can be even more dangerous that not having one at all. 

Tip #4: Analyse the Use Scenarios for risks

The next, and maybe most important step, is to analyse the tasks for potential use errors or misunderstanding. Connect these identified risk events to your existing risk assessment and expand it if necessary.

Note that analysing the risks for potential use errors is not only about mistakes done when performing the task. It is also important to analyse risks associated with not performing the task or performing the tasks in incorrect / unexpected order.

Tip #5: Update the Use Scenarios continuously

Use scenarios are living documents. Update them as your understanding of users, tasks, and risks evolves during formative evaluations or feedback from clinical studies.

In the end, the FDA expects that your validation study protocol draws directly from your Use Scenarios. The better and accurate your scenarios, the easier it is to justify that your validation tests are realistic and complete.

Conclusion

Strong Use Scenarios are the backbone of good usability engineering and a successful regulatory submission. By grounding your scenarios in real-world context, anchoring them to risk, and keeping them structured and current, you’ll meet the expectations of IEC 62366 and the FDA Human Factors guidance—and, more importantly, design safer, more effective devices.

Too often, scenarios are either too generic to be useful or so detailed they become unmanageable. And when they fail to reflect realistic use conditions, your usability engineering file—and ultimately your submission—can fall short.

About the Author
[rocket]

Accelerate your journey to CE Mark and FDA approval

Try aligned elements 30 days for free!

Start Today

Continue reading

{fastsocialshare}

Incorporating software in medical devices and building stand-alone software-as-medical-device (SaMD) devices is getting increasingly popular in our industry. For medical device manufacturers developing or incorporating SW, the IEC 62034 is the main go-to standard, representing the current-state-of-the-art to ensure compliant SW development and maintenance.

IEC 62304 details required development activities depending on the risk level of the software. The higher risk the device poses, the more activities the standard requires you to perform. IEC 62304 uses the concept of "Software Safety Classification" to determine the minimum set of activities required for a given risk level. Determining the appropriate SW Safety classification gets you the best match between the effort of the required risk reducing activities and the risk your device poses.

But how, exactly, can the safety class be determined?

A method to determine IEC 62304

Let's present the method described in IEC 62304. Starting out, we assume the highest possible class (Class C) by default. Then, we ask ourselves the three important questions that let us define the correct safety class for our device.

Question 1: "Would failure of the SW contribute to patient/user being exposed to a Hazard?".

To answer this question, clear intended purpose and good knowledge of the SW architecture and functioning are required. If the answer is "No", the class is considered to be the lowest (Class A) and no further questions are required.

However, if the outcome is "Yes", things start to get interesting! By getting this far, the conclusion is that a SW failure CAN "expose patients to hazards". But how bad is that?

To proceed, we must conduct a risk analysis according to ISO 14971 to identify, mitigate and evaluate the risks caused by SW failure in our device. The result will be a list of residual risks with a determination of their acceptability.

With the residual risks available, we can address:

Question 2: "Are the residual risks related to a SW failure unacceptable"?

If the answer is "No", again, the safety class result in the lowest class, Class A, and no more questions are required.

If the answer is "Yes" (i.e. there is at least one residual risk related to SW failure that is not acceptable), the result is either Class B or Class C depending on the severity if the (unacceptable) residual risks.

Arriving at our final question, we ask:

Question 3: "Is the resulting injury from the residual risks 'serious' or 'non-serious'?"

Determining whether an injury is serious or not is based on definitions provided by IEC 62304.

If "serious", we get a Class C.

If non-serious, we end up with Class B.

The curveball: SW Failure occurs with 100% probability

We conclude that the risk analysis is central to the process of determining the appropriate software safety class.Valentin Chapuis small

However, to accommodate to the special characteristics of software, IEC 62304 requires two specific additional constraints when performing the risk analysis for safety class determination:

  • SW failure occurrence shall be assumed to be certain (e.g. the SW failure probability of occurrence shall be 100%).
  • To mitigate risks arising from a sequence of events involving a SW failure, only risk control measures external to the failing SW can be considered.

It is the first constraint, in particular, that has caused headaches in an entire industry. At face value, it seems to entail that "with an assumed failure probability of 100%, the vast majority of our risks will become unacceptable, and we will end up with Class C". For those developing software, this seems absurd since they can observe with their own eyes that the software, in fact “does not kill everyone, every time!".

Software Failure Only One Step in Event Sequence Leading to Hazards

By taking a closer look at what constitutes the probability of a risk, we can come to grips with the infamous 100%.

ISO 14971 defines risk as the “combination of the 'probability of occurrence of harm' and the 'severity of that harm'”. Further, the overall 'probability of occurrence of harm: P' is (according to the standard) the intersection of two separate probability components, that we’ll call “P1” and P2”:

  • P1 reflects the probability of a hazardous situation to occur; and
  • P2 reflects the probability that a hazardous situation results in a defined harm.

Whereas P2 in general depends on clinical factors, P1 on the other hand, is the result of a sequence of events, where each of the events have its own probability to occur. Together, they lead up to the occurrence of the hazardous situation.

The important point is that in this sequence of events, the SW failure may constitute only one link in such a chain of events.

If the probability of occurrence of the other events in the sequence can be justified as not being 100%, then the combined P1 (of occurrence of the hazardous situation) will be lower than 100% even if the SW failure is considered certain (as required by IEC 62304).

100% SW Failure Probability in Safety Classification vs. Risk Management Activities

Another common misconception is that "SW failures probability is 100%"-assumption shall be applied throughout the entire risk management lifecycle.

This is not what IEC 62304 says. The standard only requires this assumption in the context of SW safety class determination.

Should you have data demonstrating that a given SW failure probability can reliably be estimated (at a lower value than 100%), IEC 62304 does not forbid the use of an "evidence-based" SW failure probability estimate in the context of the risk management activities executed to evaluate the benefit/risk profile of the medical device.

Accurate Software Failure Risk Assessment: Streamlining Regulatory Efforts

Since 2006, the "SW failures probability is 100%"-assumption has been the “bête noire” of IEC 62304. Still today, the question causes agitation among professionals.

To summarize what we know so far, we conclude that:

  • In the context of determining a SW safety class (and only in this context), the standard indeed requires SW failures to be considered as occurring with maximal probability (100%).
  • However, considering this to imply that SW failure-related harm occurrence is always 100% is a simplification. The SW failure may only be one element in the sequence of events leading to a hazardous situation. The sequence as a whole might not always (i.e. with a 100% probability) result in patient/user harm.
  • Therefore, to dogmatically estimate the SW-related harm occurrence probability as maximal might result in an artificially high IEC 62304 safety class assignment. This, in turn, leading to unwarranted additional development, testing or documentation effort.

About the Expert

Valentin Chapuis is a Senior Expert in Quality and Engineering at ISS AG, with seven years of experience in the MedTech industry and consultancy. Holding a Master of Science in Materials Science and Engineering from EPFL, he specializes in risk management (ISO 14971) and compliance for medical device software.

ISS Logo RGB weiss big 300 172

{fastsocialshare}

When a medical device manufacturer seeks a Regulatory or Quality software system, the choice between SaaS (Software as a Service) and On-premise deployment can be a tricky one.

What is the best option for you?

In this article, we will spell out the major differences between the two and how they can help you get the most out of your digitalization strategy.

Comparing SaaS vs. On-Premise

Before 2010 and the era of cloud computing, applications were almost exclusively deployed in the company's own network. However, in this day and age, almost all applications are available as SaaS.  

As stated in the notions themselves, the primary distinction between SaaS and On-premise solutions lies in their hosting arrangements: SaaS solutions are managed and hosted by an external provider, in this case the application vendor which in turn might use sub-suppliers for hosting services, whereas on-premise solutions are managed and hosted by the client organization internally.

Deciding which implementation type is best suited for your company depends on several factors, such as your budget, goals, validation efforts, security needs, and the overall company culture. Just as with evaluating SaaS options, you should thoroughly assess your choices before deciding on an implementation method.

Cost and Budgetsmallallan

A key advantage of SaaS solutions is their relatively low initial cost. As companies subscribe to a SaaS on a rental basis, there is no requirement for a substantial upfront investment. Subscription fees, which are paid monthly or annually, vary based on the type of licence and number of users.

It is equally easy to step out, by simply cancelling the subscription. While this approach helps keep initial expenses down, the total cost of ownership may become unfavourable over a longer time. Failing to make SaaS payments in time can also lead to grave consequences, as the hosting partner can decide to delete your resources if payments are not provided as per the Service Level agreement.

An On-premise solutions have a higher initial cost because the device manufacturer must buy the necessary hardware or cloud resources and cover the expenses for its setup and deployment.

Although the ongoing maintenance costs may be minimal (sometimes by sharing resources among many systems), in-house solutions necessitate a dedicated IT infrastructure and IT personnel for maintenance and troubleshooting. Over time, hardware upgrades contribute to further costs.

Ownership and Timelines

A SaaS application tend to become operational almost immediately. It is in the SaaS vendor's best interest to automate the deployment process, have special set up and maintenance competence in-house, and to help the client to get started, in order to quickly start tapping into the revenue stream. The same principle goes for the deployments of service packs and security updates.

If the application is hosted On-premise, the deployment and configuration tasks tend to fall under the responsibility of the IT department. In some organizations, the IT department automatically becomes the owner of any acquired IT system and being the owner of many systems, your SaaS system may not always be the IT department's top priority. The actual deployment time therefore tends to be longer.

Security and compliance

Contrary to popular belief, storing your data in the cloud, like in SaaS applications, is not necessarily riskier than storing it On-premise.

A SaaS vendor stands and falls with the security he provides, and therefore a serious SaaS vendor has IT security as one of his core competences. Industry standards such as SOC and ISO 27001 are a good way to vet suppliers regarding the security dedication. The security of your data will be his absolute primary concerns, and he will continuously work to improve it. This includes the planning and handling of backups, monitoring, and disaster recovery planning.

If the Quality data is considered to be of strategic importance in our organization, you might feel safer to manage the data under your own roof.

Keeping the data On-premise potentially gives you the possibility to place the system entirely inside your own network, limiting its exposure to the outside world. This is fine, as long as all users operate within your network, which is not always the case if your workforce is distributed and/or your clients and suppliers needs access to your QARA applications.

A further point to consider is the location and deployment of the systems with which your QARA system integrates. Are they On-premise application or are they SaaS products? What possibilities and constraints does the selected hosting arrangement imply for your integration strategy?

Validation and Version control

Quality and Regulatory software (often) need to be validated. This also goes for updates and re-configurations. As we all know, validation efforts come with a considerable expense, and it is therefore often in the customer's best interest to have tight control over any changes to the validated application.

In some cases, SaaS suppliers push out new versions of their software without consulting or even informing their customers, invalidating the current application state. This can lead to unexpected validation efforts as the SaaS customer have little control over the SaaS infrastructure or, even worse, if this occurs immediately before or during an audit. On the other hand, when it comes to urgent security updates, it can be argued that a SaaS supplier in some cases can supply and deploy such updates considerably quicker than an in-house IT organisation.

Having an On-Premise deployment increase the control over when and to what version upgrades shall take place. This gives the customer a better way to assess the change scope against the validation effort required and hence decide whether an update to the particular version is warranted, given the expected validation costs.

Conclusion

Both On-premise and SaaS offer their unique sets of pros and cons. SaaS offers low initial costs, quick deployment, and flexible subscription pricing, but may lead to higher long-term costs and less control of the update cycles. On-premise solutions require significant upfront investment and longer deployment times, yet provide greater control and potentially lower ongoing maintenance costs.

The best choice depends on your budget, goals, security needs, and company culture. Careful evaluation of both options will help you make an informed decision that supports your digitalization strategy.

About the Expert

Allan Brignoli is DevOps Specialist and Security Expert at Aligned AG with years of experience in deploying, configuring and maintaining quality and regulatory applications in both cloud and in on-premise scenarios. He has a leading role in Aligned's efforts to uphold its security posture and is a central figure in Aligned AG's ISO 27001 effort.  

logo

{fastsocialshare}

You’re ready to create your first AI-based medical device. You have the idea, the data, and the right team of experts. But even with all that, success isn’t guaranteed.

In fact, you might already be just a couple of steps away from failing.

Note: this article focuses on predictive AI algorithms, not LLMs nor computer vision.

Step 1: Neglect Data Quality

The foundation of any AI model is the data it’s built on. Using incomplete, unclean, or biased training data can cripple your device’s reliability and lead to inaccurate predictions or recommendations. For example, if your training data lacks diversity, your model might underperform for certain demographic groups, potentially leading to inequitable care.

How to Succeed Instead:

  • Invest in high-quality, representative datasets that reflect real-world variability.
  • Prioritize data cleaning, annotation, and validation to ensure your model learns from accurate and relevant inputs.
  • Regularly assess data quality to identify and address gaps early.

Step 2: Quickly Drop an Algorithm That Has Good Performance

Finding an algorithm with promising performance is an exciting step, but stopping there is a mistake. Without thoroughly examining its weaknesses, you risk deploying a model that overfits the training data, fails in real-life scenarios, or performs poorly for specific subgroups. A deeper analysis and refinement are essential to ensure robustness and fairness.

How to Succeed Instead:

  • Look for potential overfitting by testing the model on independent, real-world datasets.
  • Conduct subgroup analyses to identify performance gaps and address biases.
  • Iteratively refine the algorithm by incorporating additional data, tuning hyperparameters, or adjusting features.

Step 3: Create an Opaque Model

Clinicians and regulators need to trust your AI system, and trust starts with understanding. If your model is a "black box" that provideschelli small
predictions without clarity on how it arrived at them, it risks being dismissed, regardless of its accuracy.

How to Succeed Instead:

• Use explainability tools like SHAP or LIME to provide insights into how your model works.
• Develop a “model card” to document the purpose, performance, limitations, and risks of your AI.
• Communicate clearly with end-users (patients, physicians, regulators, …) about what your model can and cannot do.

Step 4: Ignore the End-User Experience

Even the most accurate AI system will fail if it’s not user-friendly. Healthcare professionals need tools that seamlessly integrate into their workflows, with outputs that are easy to interpret and act upon. Poor usability or lack of training can lead to frustration and abandonment.

How to Succeed Instead:

  • Conduct usability testing with real end-users to identify pain points and optimize the interface.
  • Provide training materials and ongoing support to ensure users understand how to use the device effectively.
  • Design outputs that are actionable, concise, and clinically relevant.

The Real Path to Success

Building an AI-based medical device that genuinely improves patient care is both a challenge and an opportunity. Success requires a meticulous and thoughtful approach that avoids common pitfalls and ensures your solution is reliable, explainable, and user-friendly.

Here’s how you can stay on the right path:

  • Invest in High-Quality Training Data: Start with diverse, clean, and representative datasets to ensure your model captures real-world variability and serves all patient groups equitably.
  • Refine Your Algorithm: Don’t stop at good performance. Analyze potential weaknesses, address overfitting, and optimize for fairness and robustness, especially across subgroups.
  • Ensure Transparency: Develop explainable models that clinicians can trust. Use tools like SHAP and LIME, and document your AI with clear “model cards” to communicate strengths and limitations.
  • Focus on User-Centric Design: Create intuitive interfaces and actionable outputs that integrate seamlessly into clinical workflows. Engage end-users in usability testing and provide comprehensive training.
  • Stay Compliant with Regulations: Align your development process with applicable standards like MDR, FDA guidelines, and the AI Act to meet regulatory requirements and inspire confidence.

By prioritizing these key aspects, you’ll create an AI-based medical device that not only meets the highest standards but also earns the trust of healthcare providers and delivers measurable value to patients.

About the Expert

Dr. Mikaël Chelli is an orthopedic surgeon and the co-founder of Sciencer, a platform empowering healthcare professionals to develop AI-driven solutions for precision medicine.

EasyMedStat
Specializing in shoulder and elbow surgery, he combines his clinical expertise with a passion for data-driven innovation. Sciencer allows device manufacturers to easily create explainable, evidence-based, and regulatory-compliant machine learning models.

{fastsocialshare}

When working with software risk management, you have probably been told to assume that software constantly fails. This is a rather dull and not particularly encouraging point of view, especially for SaMD, since it consists exclusively of software (which apparently “always fails“!). However, implementing risk control measures in SaMD makes a difference. 

Let’s start by getting the foundation straight!  

Software risk management misconceptions

Let’s take a closer look at the risk probabilities according to ISO 14971, consisting of Po = P1 (probability of a hazardous situation occurring) and P2 (probability of a hazardous situation leading to a particular harm).

A common misconception is that Po should be set to 100% when working with software. That's utterly wrong, as I explain in this video or, if you prefer reading, this blog post. Furthermore, assuming that P1 is 100% just because it is software may also be wrong because a combination of factors may contribute to the sequence of events resulting in a hazardous situation.

We also know from experience that software does not constantly fail. How else would it pass a software system test before release? (I sincerely hope you don't release software that constantly fails!) 

The secret lies in understanding and distinguishing between risk evaluation before and after implementing risk control measures.

Initially, during the risk identification phase, it is correct to assume that no risk control measures are implemented. It also includes the assumption that software constantly fails.

However, by adding risk control measures, we can argue that we successfully reduce the probability of the software failing.

Let's look at the risk control options available when working with SaMD. 

Process vs Product

Typically, most risk control measures are (and should be) implemented into the product itself. For non-software products, you may also find risk control measures, such as various types of inspections in production. However, production inspection is not an option for software – or is it? kaestner

Consider pressing the compile button during development. That is, in a way, software “production”, is it not? Just as hardware production has upstream production process steps, including inspections, before the final assembly, software “production” also goes through an extensive process before reaching its final, compiled state.

Therefore, implementing inspections throughout your software development work can be considered risk-reducing activities, similar to production inspection steps for non-software medical devices. The software development standard IEC 62304 is all about reducing risk by applying a process!

A solid development process can be claimed to reduce the probability of software failure. It will, for instance, provide evidence that the software worked as intended during the system test before its release. Consequently, take advantage of the opportunity to leverage your software development process as a risk control measure in your risk analysis work!

In addition to having a solid software process, explore how the design can be improved to reduce risk.

Some argue that there is no point in exploring risk control measures in SaMD since, as previously mentioned, software will always fail. Please don’t fall into that trap; risk control measures in SaMD can have a huge risk reducing impact! 

SaMD risk control option analysis

From ISO 14971, we have learnt that risk control options come in the following flavours: 

  1. inherently safe design and manufacture; 
  2. protective measures in the medical device itself or the manufacturing process;
  3. information for safety and, where appropriate, training to users. 

Obviously, for SaMD, we can’t do much about “manufacture” and “manufacturing process” for individual risks besides following a process that will reduce general probabilities. But let’s look at the options individually and translate them into a SaMD context. 

Inherently safe design

Inherently safe design avoids requirements and designs that can result in hazardous situations by omitting such features. A non-present feature can’t cause harm. But a SaMD without features is, of course, not very attractive. Hence, the omission strategy will not suffice.  

The second-best choice is to design SaMD to avoid hazardous situations. For instance, insufficient processing capacity can result in delays that can lead to various hazardous situations. A robust operating system, prioritising critical tasks over others, is a valid risk control measure that can make a SaMD safe by design.  

In summary, if you can’t remove features or hazards, look for design approaches that prevent hazardous situations from occurring.  

Protective measures

For non-SaMD devices, a typical example is having a physical stop to prevent movement from causing harm, such as avoiding a piston penetrating a chest. SaMD has no physical surroundings offering that kind of help. Hence, protective measures must be implemented within the software.  

Assuming you have explored all the options for an inherently safe design, you should:

  1. Explore how to detect hazardous situations.  
  1. Once detected, what can you do about them?

Let's assume you are concerned about data corruption. Implementing a checksum test would detect such a failure. Once that information is available, you can decide the best course of action from a safety point of view.

In summary, SaMD protective measures are about identifying hazardous situations and taking appropriate actions.  

Information for safety and training

Relying on the user and considering information and training as risk-reducing measures are by far the least attractive risk control alternatives.

However, unless your SaMD is a service (without any user interface), SaMD has an advantage over many other medical devices since you can present the information directly in front of the user and further force the user to acknowledge information presented on a screen, such as “This is a potentially dangerous operation. Please confirm.", followed by "Yes, continue!" or "No, abort!”.

Presenting information "up front" during the function flow has great advantages over placing it in a user manual that rarely gets read.

How information is presented to the user shall, obviously, be evaluated and performed with great care. This is strongly related to human factors engineering based on IEC 62366-1.

In summary, information for safety and training can prove to be a more effective risk control measure when used in SaMD compared to other medical devices. 

Connecting the dots

Developing a safe SaMD requires a mix of risk control measures that collectively reduce the probability of harm. The various options discussed above influence Po in different ways. Let’s explore the impact using the formula Po = P1 x P2. 

Applying a process, i.e. IEC 62304, reduces P1 generically and lowers all risks. Or, as phrased in IEC/TR 80002-1:

The use of such a PROCESS can then be claimed to reduce the probability of occurrence of software ANOMALIES.” 

In SaMD, the inherently safe design reduces P1. If you remove features causing hazardous situations, then the software’s contribution to P1 = 0%. Good design strategies might be equally effective. 

Next are protective measures, which, in a SaMD interpretation, are most likely to reduce P2 because the hazardous situation is already present. In these cases, the primary objective should be to reduce the probability of harm arising from it. 

Lastly, information for safety and training can reduce both P1 and P2 depending on how the risk control measure is defined. 

In summary, if you use all the risk control options, the Po formula would look like this:

Po = P1(process) x P1(safe design) x P1(information) x P2(protective) x P2(information) 

Conclusion

A traditional risk control option analysis can be translated into a meaningful and valuable SaMD context. Working through the three risk control options provides complementary approaches to controlling risks.  

Last but not least, I advise investing in and maintaining your software development process. This investment will result in fewer bugs, happier patients, and less exposure to harm. 

About the Expert

Christian Kaestner is a consultant and entrepreneur with a wealth of knowledge about the medical device industry, working as Course instructor at Medical Device HQ. He is an expert member of the project team authoring IEC 62304 and also actively participated in the creation of IEC 82304-1.

He has extensive experience of medical device development and, as a software developer, a strong dedication to software development.

In the software domain he has worked in many roles such as software developer, project manager, auditing and quality management.

{fastsocialshare}

Formative evaluations are a medical device development team's secret weapon, holding the power to catch and fix safety and usability issues early—before they become costly problems.

By observing how representative users interact with prototypes or by having experts evaluate early designs, formative evaluations allow us to refine, rethink, and even reimagine our approach. This process drives the design in the right direction of becoming a safe and effective medical device.

When to Conduct Formative Evaluations

To maximize their impact, formative evaluations should start early in the development process. This timing ensures that designers can identify usability issues and safety risks while changes are still relatively easy and cost-effective. Delaying formative evaluations to later stages risks valuable insights being lost or minimized, as changes become more challenging and costly to incorporate as the design nears completion.

Planning Formative Evaluations

usability
Conducting a formative evaluation requires a representation of the medical device, such as a simple mock-up, sketch, or functional prototype, depending on the development stage. The prototype should be evaluated against planned use interactions, described in scenarios, use cases, or tasks.

Selecting scenarios for evaluation should be risk-based, prioritizing scenarios that represent higher threats to user safety and to effective use. Therefore, it is a prerequisite to analyze these scenarios for potential risks before beginning formative evaluations. This ensures evaluations are focused for the final validation step and aligned with critical safety aspects, as risk assessments serve as inputs to formative evaluation activities.

How to Perform Formative Evaluations

Methods for formative evaluations fall into two main categories: expert-based methods (e.g., cognitive walkthroughs, heuristic evaluations) and user-based methods, where users are observed and later interviewed about their interactions with the device. Expert-based methods are ideal for early-stage evaluations, while user-based methods yield greater insights when the design is more concrete.

In both cases, the objective is to identify potential use difficulties, close calls and use errors. These observations highlight risks that should be addressed in the device's risk assessment, ideally through design changes (e.g., User Interface Specifications). Risk assessments thus serve a dual purpose, functioning both as inputs and outputs of formative evaluation activities.

Beware of Bias

Bias can influence the outcomes of formative evaluations, both from observers and test participants. Emotional investment in the current design might impact an observer's impartiality or openness to feedback from participants. Having a design team member serve as an observer may lead to biased interpretations of participant comments.

Andrea
Repeated use of the same individuals as test participants in multiple usability tests can also introduce bias, as they may implicitly compare the current design with previous versions rather than provide an unbiased assessment. Planning, assessing, and mitigating bias is, therefore, fundamental to a successful formative evaluation.

Why Formative Evaluations Are Essential

Formative evaluations do not yield binary "pass/fail" results; they generate qualitative observations. The goal is not to achieve a "passed" or "failed" outcome, but to gather insights that inform design. Ultimately, the formative evaluation's purpose is to drive the design forward, aligning it with user needs and safety—not to verify it.

Conclusion

Formative evaluations are valuable opportunities to shape a safer and easy-to-use device design, with each insight guiding us closer to a truly safe and effective medical device. By prioritizing early evaluations, we not only reduce costly design changes but also ensure a development process deeply rooted in user-centered principles.

About the Expert

Andrea Schuetz Frikart is a Senior Project Manager with extensive experience in the user-centered approach for designing safe and effective medical devices in the EU and U.S. regulatory framework. Her expertise lies in human factors engineering, particularly in compliance with IEC 62366 standards, the FDA guidance and all related human research studies. She is a passionate lecturer for professional training, workshops and academic-level courses.

As a specialist in human factors methodologies, she holds a Master of Advanced Studies (MAS) in Applied Psychology. Find here Linkedin profile here

{fastsocialshare}

Using applicable and recognized industry standards (such as ISO 14971 or IEC 62304) is a known best-practice in medical device development. Even though standards are voluntary for medical device manufacturers, they represent the current best practices and thus state-of-the-art and serve as a great mechanism to structure your development and documentation efforts. By complying to recognized standards, you take the shortest possible way to a swift regulatory approval and a rapid market entry.

But in the vast sea of available and continuously updated standards (ISO alone has issued more than 25000 standards), where do I find the correct ones, and how do I know which standards apply to my device?

Apart from a seemingly overwhelming task to sift through all possible standards, overseeing an important standard or applying an outdated version can have significant repercussions for your device. Failing to get your standards right might delay market-access by months, or even years, if a redesign is required.

Here is how you do it.

Identify the intended geographical markets for your device

First, decide on the geographical markets you intend to target with your device. Answering this question will give you the list of regulatory bodies that governs the market-access to these countries.

Now when you know where you will market your device, assess the following two types of sources for standards:

  1. The standard databases of the regulatory bodies in your intended geographical markets
  2. The standard databases of the standard publishers

Inspect the regulator's standard databases

Most local medical device regulators have a list or database of standards they recognize for conformity assessments, for example the FDA recognized consensus standards in the USA, the harmonized standards in the EU or the designated medical device standards in UK.

These lists include the standards and their versions, recognized by each local regulator. By being compliant to these standards, you show conformity in that geographical market.

List of applied standards small
In order to find out which of these standards that apply to your particular device, you will have to assess each standard separately. As some of these lists are fairly long, this may seem like a daunting task. When available, use the built-in search functions in these databases to narrow them down. The FDA list, for example, allows you to search for:

   > general standards applicable to all (or at least a many) devices, as well as

   > standards recognized for your three-digit product code (ex. QOT for emergency ventilators).

 The standards publisher’s databases

There is usually a time-gap between the publication of a standard and the time it is accepted by the regulators, as a recognized standard. This time gap can sometimes cause problems, especially for emerging technologies. What happens if you work with a technology for which no recognized standard exists?BeatKeller

In such situations, it is a good practice to consider existing published standards that are not yet recognized. These standards represent state-of-the-art and therefore, complying with them will future-proof your design and documentation.

These standards will simplify market access, as they are acceptable proof of safety and/or effectiveness for most regulators, importers, distributors and in the end, customers.

Therefore, after having consulted the standard lists of the regulators, I also check the databases and/or web stores of the publishers of standards such as ISO and IEC.

Note that the regional / local standardization bodies such as CEN and CENELEC for Europe, ANSI and AAMI for US or CSA for Canada are valuable sources to find additional standards.

Wait! There are different versions of the standards?

It might happen that you find different versions of the standard in different databases. In this case, I always prioritize the newest version as being state-of-the-art. However, I would recommend to check with the regulator whether they accept a newer version of the standard in the conformity assessment or not.

Some regulators insist on using an older version of the standard. In this case, you will have to show compliance with the old version of the standard for this market.

One pitfall to avoid: when an international standard is published, it might take some time until the regional equivalent is published, and therefore it gets another year-number. Even there is another publication year, check whether the regional standard is based on the same international standard by reading the cover page and foreword. For example:

Standard

International

European EN

IEC 60601-1 Edition 3

2005

2006

ISO 10993-1

2018

2020

Even they have a different version-date, the normative content is equivalent and only the European foreword and annexes have been added.

Ensure compliance with product standards

As a next step, I recommend to map any product related requirements derived from, or explicitly mentioned in the standards into the ALM / requirementsRequirements small
management tool. By doing that I can now link them to the technical requirements of the device.

This process ensures that all requirements of the standard are implemented. Further, it provides a powerful rationale to the derived technical requirements and minimizes the risk of becoming non-compliant by inadvertently changing a technical requirement based on the requirement from a standard.

Tests reports from test laboratories to show compliance

The last step is to demonstrate documented proof of compliance for each standard. This can be done in several ways, depending on the standard in question.

You can refer to one of your certifications (e.g. ISO 13485 certificate), or by documenting it explicitly, for example in a dedicated report. Writing such reports are generally done either in-house (e.g. within the V&V (Verification & Validation) department) or outsourced to an external test laboratory.

The latter approach is particularly useful when you as a manufacturer do not have the necessary equipment (e.g. for electrical safety, EMC, biological tests etc.) in house. A test report from an external, independent laboratory is the way to go in these situations.

When selecting an external lab, pay attention to the requirements of your target markets for the test lab. Some regulators require that you use a laboratory with a IECEE CB (Certification Body) certificate, or that the laboratory is accredited or even that the test lab is located in the specific country you have targeted for market-access.

For IEC standards (such as IEC 60601-1 for basic safety and essential performance of medical electrical equipment): the testing branch of IEC, the IECEE, has issued dedicated test report forms (TRF) for most IEC standards. These contain multiple tables mapping the tests to the clauses in the standard.

These allow you to document whether this standard requirement is applicable, fulfilled, and what measurement results have been taken.

If you prefer to do these tests in-house, these test report forms (TRF) can also be purchased at the IEC web store.

If you need to show compliance with a standard for which no TRF can be acquired from IEC/IECEE, I recommend you set up an equivalent mapping table using four columns such as this example, demonstrating how to find the corresponding proof of compliance in your own documentation.

 Clause 

 Requirement

 Comment/Reference

 Verdict 

1.2.3

The IfU shall note the address of the manufacturer

IfU V1.2.pdf, section 3

P

1.2.4

The IfU shall warn if the device cannot be used outside a building.

N/A, device can be used outside a building

N/A

Conclusion

In summary, managing medical device standards is key to ensuring compliance and market success. Although the number of standards can be overwhelming, a clear approach—starting with identifying your target markets and checking both regulatory and standards databases—helps you find the right ones for your device.

Staying up-to-date with standards, linking requirements to your design, and obtaining proper proof of compliance will minimize risks and avoid delays. By following these steps, you can streamline the regulatory process and bring your product to market faster, giving you a competitive advantage in the medical device industry.

About the Expert

SMDClogo1
Beat Keller is an electronics engineer with specialization in Regulatory Affairs and Quality Management. He is founder and CEO of Swiss Medical Device Consulting GmbH.

Mr. Keller assists medical device manufacturers getting their medical devices to the market swiftly and efficiently through compliance with international regulations and standards. You can reach him on LinkedIn at https://www.linkedin.com/in/beat-keller/

{fastsocialshare}

There is no way around it.

If you are developing a medical device, writing Design Requirements is something you will have to do.

Writing good Design Requirements, on the other hand, is "optional" and, in my opinion, an acquired skill.

At konplan, many years of medical device development experience for numerous medical device manufacturers have taught us the difference between good and bad requirements. In this article, I will share some of our tried and tested best practices, lessons learnt in our pursuit of the well-written Design Requirement.

A Design Requirement shall describe the product

As opposed to a Stakeholder Requirement, that ideally capture what stakeholders expect of the product, reflecting their needs and desires, the design requirements focus on how the product fulfils these needs.

They are intrinsically more technical in nature, and therefore also more functional in character. In short, Design requirements are best when they describe the product, preferably in atomic statements.

Avoid confusing process requirements ("All requirements shall be verified" or "The product development shall be ISO 13485 compliant") with Design Requirements. Process requirements do not describe the product and are inherently awkward to verify. Low level details, such as UI style guides or architectural decisions are better not placed among the Design Requirements but rather in their dedicated categories (Specification Documents or Architectural Documents respectively).

'Acceptance criteria' is mandatory

Design requirements shall be written as S.M.A.R.T. (specific, measurable, achievable, relevant, time-bound). However, in our experience, much headway can be made by spending extra focus on the 'measurability' as it is so closely related to the testability of the requirement.

A good way to address this is to include an explicit Acceptance Criteria. This helps the Verification team to correct untestable requirements and to perform an early assessment on the efforts needed to verify the requirements downstream.

Another tip: if numbers are used in the requirement, always justify the origin of these numbers. This helps the verification team doing a good job and is also important for posterity.

Only include MUST Requirements

Any 'should', 'would', 'could' or 'nice-to-have' requirements should be lifted out of the Design requirements document into a separate Product Roadmap.Ivo Locher

Limit the Design requirements to MUST requirements only. Do you have time to implement anything “nice-to-have”, instead of a “must”?

Any kind of priority issues are inherently resolved by only allowing “MUST” requirement. Even though the intention of such priority levels is to give the design team a possibility not to implement certain requirements if there should be a squeeze in the timeline, the effect is often the opposite: conflict, confusion and time-consuming disputes.

Bonus: Use the EARS syntax to write Requirements

A consistent language when writing Design Requirements can be a challenge. We, at konplan, have found the EARS syntax for describing Design requirements to be simple to use and easy to communicate to the team.

It favours clarity and structure, making them easy to understand while reducing ambiguity. If you have not tried it, you should really take a look at them. It has definitely helped my team to reduce the chance of misinterpretation, making it easier to communicate design requirements clearly.

Conclusion

There are of course other aspects in play when working with your Design Requirements. However, keeping these simple principles in mind should help you to take the next step in your Design Requirement journey.

In my opinion, they are not controversial and should be easy to include in your own Design requirement work without having to rework any existing procedures and development processes.

Remember: There is no absolute right or wrong, only better or worse. If you were on the better or worse side will become obvious during the development!

About the Expert

Dr. Ivo Locher is an electrical engineer with specialization in wearable computing and signal processing.

konplan
Currently, he acts as program manager at konplan ag and he is expert in systems engineering. During his career, Ivo has successfully led several medical device development projects, starting from requirements engineering up to market clearance.

Read more at: www.konplan.com

A common question among medical device manufacturers is whether an electrical insulation concept or diagram is required by IEC 60601-1. The short answer is "No". The right answer is:  "You should still make one". The early development of an electrical insulation concept is a tried-and-tested best practice for achieving a medical device that is both safe and compliant with the relevant standards from the IEC 60601 family.

Step 1) Draw a picture

Prepare a drawing giving the general overview of your device's electro-technical concept. A basic block diagram representing the areas with different voltage levels is a good starting point (e.g. mains voltage, secondary voltage, battery).

Then add parts relevant to the possibility of electrical shock. Here we find parts accessible to the user / operator (accessible parts) such as enclosures, buttons, accessible pins of signal-input/-output-part, ports etc. Furthermore, add applied parts that have to be in contact with the patient such as sensors, patient supports, instrument parts etc.

Step 2) Identify general requirements

Benjamin Weber w text
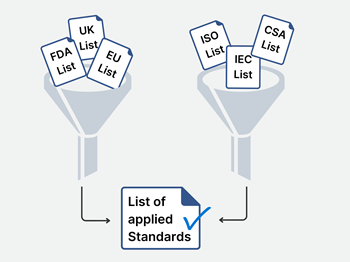
Identify the applicable general requirements for separation of those parts, e.g. between enclosure parts and mains voltage parts in IEC 60601-1. The specification for such distances concerns creepage distances and air-clearances. Remember to consider dielectric strength test voltages for solid insulation materials.

Step 3) Dig deeper into the IEC 60601 standard series

Look into collateral standards (e.g. home healthcare in IEC 60601-1-11 or emergency care in IEC 60601-1-12) and particular standards (e.g. HF surgery devices in IEC 60601-2-2, ECG recorders in IEC 60601-2-25 or nerve and muscle stimulators in IEC 60601-2-10) applicable to your device!

There might be also be relevant requirements to consider, e.g. regarding the use of the protective earth connector or applied parts classifications.

Conclusion

Preparation of an electrical insulation concept and diagram is not rocket science! You will benefit from starting during the early stages of development, since it provides crucial technical requirements with high impact on further development tasks. As we all know, making fundamental changes in your device design late in the development cycle is something you want to avoid, due to the high costs such changes incur.

For the inexperienced, it can be difficult to identify the relevant standard requirements in IEC 60601 standard series due to its complexity. If you are not working with it every day, do not hesitate to get in touch with professionals!

About the Expert

Dr.-Ing. Benjamin Weber studied biomedical engineering in Lübeck and received his PhD in the field of calibration of pulse oximeters. In 2016, he joined KEYMKR GmbH and led the testing laboratory to it’s first DAkkS accreditation in 2018. Since 2020 he is head of the testing laboratory with a strong focus on medical electrical devices and the IEC 6060 standard series.

Keymkr Logo Zeltgrau Claim 50mmKeymkr, Lübeck Germany, are experts in Compliance Engineering, Technical Documentation and access to international markets. Keymkr also provides Product Testing (IEC 60601-1 and IEC 61010) for Medical Devices (MDR and IVD) and hosts an accredited testing laboratory.

Read More on Electrical Insulation Diagrams - The Basics (in german)